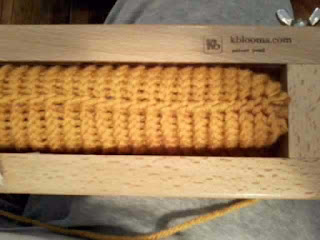
One of my favorite things to do is to make socks and slippers. I love soft, cozy things that wrap my feet in warmth. I make a lot of socks, and I usually use one of my looms. This pattern is for one of the simplest pair of slip-on booties you will ever make. They don't require making heels and you can knit in the round, with just one seam to make. Even better, the pattern can be adjusted for any loom, even though I used my all-in-one loom from KB for this pattern.
This pattern will make a slipper bootie that will fit most teen or adult feet. For a man's slipper, you would probably need to make it bigger.
I know, it looks more like a pocket than a slipper, but that's why I put the photo of how they fit first. As you can see, there's lots of stretch in these little, easy to loom gems.
On the 28" All-in-one loom, I started by using the five-peg sliding pieces and adjusting the sliders so that I would be knitting in the round over 60 pegs.
To form the toe and decrease for the cuff, I decreased by knitting two together on the last two pegs before the slider, then sliding it down one peg to keep me knitting in the round on 48 pegs.
 |
| Decreasing on the corner pegs |
 |
| Push the five peg slider down one peg |
Place a marker at the peg that is 7 pegs from the end of the row facing you. I like to knit left to right since it is easier to move the right slider and still have one slider side close to the edge.
Knit 12 rounds of the full 60 pegs.
At this point, I find it easiest to seam up the bottom of the slipper, because it's being held even and secure on the loom. You don't have to do this seam now, you can wait until you're done. But there's something very satisfactory about taking a finished bootie off the loom and having nothing left to do. So, I just push the bottom up through the loom and sew up the bottom seam from the wrong side, then push it back down and continue knitting.
Decrease
I begin by moving the loop on the corner pegs of the long sides. Move the corner loop to the loop before it on one side, then turn the loom and move the corresponding loop on the opposite corner to the peg next to it on the side in the same manner. (see the photos above) In this way, the two pegs that are next to the pegs on the slider are empty. Move the slider down to the pegs that now have two loops on them.
Knit the row with the k2togs. Then knit another row.
Decrease again in the same manner. Knit another row.
Keep repeating the pattern of decrease one row, knit another row until the slider has been moved down even with the peg that placed the marker on. After you have decreased that final row and knitted another row, you can start the cuff.
Cuff
5 rows of K1 P1 ribbing in the round.
Bind off, and you're done!


No comments:
Post a Comment